
Last Updated on May 1, 2025 by Eric Feldberg
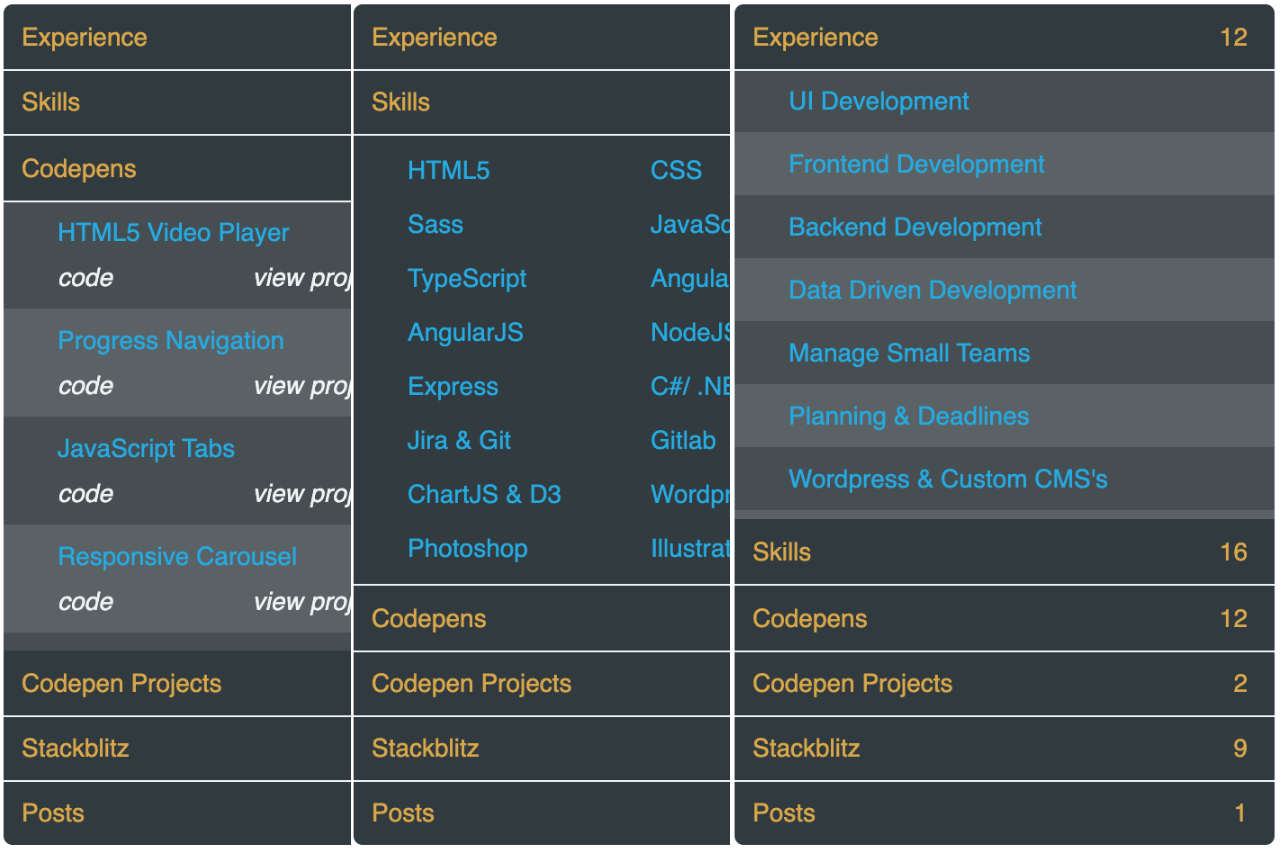
This basic Angular accordion is set up to have multiple layouts. Each of which can be easily configured to apply in any group. The code is super simple as it’s akin to basic JavaScript class toggling. Not really much to it here, but can certainly be used as a component. The number of items on the far right is the amount of objects being pushed into each group.
This is JSON powered. Meaning, the data that the Angular accordion uses is not hard coded. It comes from an API. In turn, everything could be populated from a database or customized to fit any data stream.
Table of Contents
Imported Data
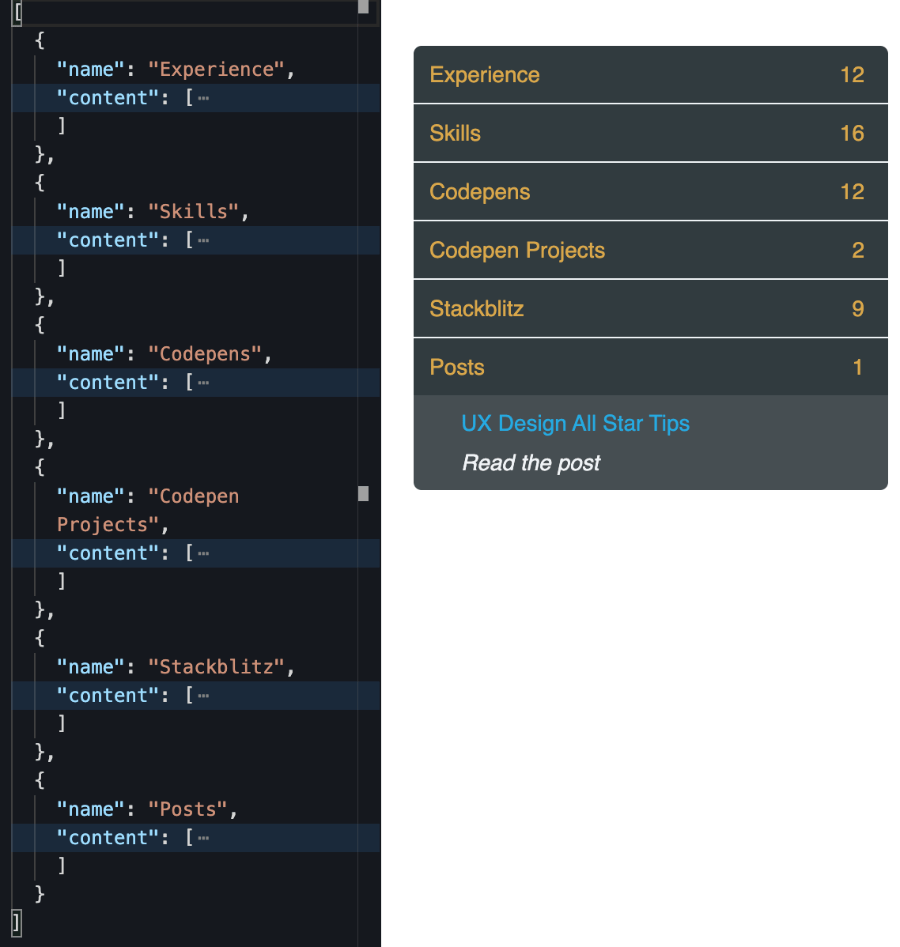
Let’s begin by looking at the JSON data stream. We can quickly see the name values match the Angular accordion headers. If the data changes, so do the headers. Taking a closer look at the content array shown above, we can quickly conclude the image below contains the data.
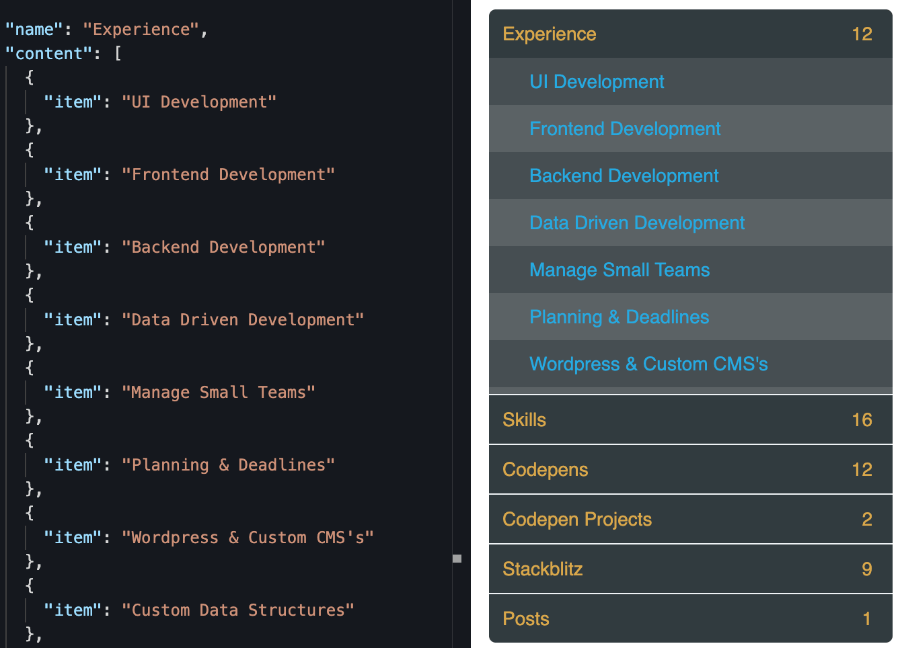
This is the case for all the sections. The name is the header while the content array populates the accordion content. Supplying the data in this manner makes the accordion a component. Components can be used many times over. Ever seen or heard of IO—input output.
We’re inputing an array of objects (JSON) and outputting an accordion component. The benefits are not just flexibility but it also makes creating additional features much easier.
Not just in TypeScript, but in lots of other languages and frameworks there’s similar concepts. Things such as an interface. Of course the names may vary, but the principles are the same.
Angular Accordion Interface
export interface AccordionData {
  content: {
    item?: string;
    title?: string;
    code?: string;
    viewProject?: string;
    link?: string;
  }[];
  name: string;
}
For those of you unfamiliar with this, it’s a representation of the payload. Not possible in JavaScript, but one of the core pieces of TypeScript and abundant in other languages such as Java and frameworks such as Spring and C#.
The type is checked at run time vs compile time. You may see interfaces prefixed with T, such as TAccordionData to help denote a valid type for future developers. Moreover this could certainly be considered a best practice in some environments as an interface or model called T is simply not intuitive enough.
Using interfaces is a security protocol to my knowledge. This ensures data that does not match the interface is never allowed to flow in. Only data that matches our “model” gets in. And thereafter, each value needs to be the type designated in the interface. String, boolean, etc.
Angular Accordion Component
- No need to worry about the import statements as these are typically added automatically
- The @Component is a decorator. Decorators are in a number of frameworks. In this case they signify the component files.
We then export the class because we want to use it somewhere else. The accordionData array holds our data stream of objects we’ve imported on the fourth line. We give the array the type of our interface to signify what the array contains.
The ViewChild business is Angular’s way of keeping track of an element. It’s similar to document.getElementById, but in UI frameworks, things are added and removed from the DOM. So, Angular uses special methods to keep tabs on elements regardless of whether it’s in the DOM or not.
The constructor is a default function in every class that fires automatically. It’s a common practice to define private variables here. So, since we need to fetch the data, we’re using a module called HttpClient.
OnInit is a life cycle hook. This is one of many functions that execute automatically when Angular loads elements, updates, and destroys content. Life cycle hooks are not native to Angular. They’re very prevalent.
We use it here to say, “on initialization” run this code.
Lastly, there’s the toggleSection function used for just that. To open one section and close another.
import { HttpClient } from '@angular/common/http';
import { Component, ElementRef, OnInit, ViewChild } from '@angular/core';
import { take } from 'rxjs';
import { AccordionData } from './accordion.interface';

@Component({
  selector: 'my-app',
  templateUrl: './app.component.html',
  styleUrls: ['./app.component.scss'],
})
export class AppComponent implements OnInit {
  accordionData: AccordionData[] = [];

  @ViewChild('accordionParent', { static: false }) accordionParent: ElementRef;

  constructor(private _http: HttpClient) {}

  ngOnInit()

  toggleSection()
On Initialization
This life cycle hook is very common as things are usually done at this point in the rendering process.
We use the variable defined in the constructor function. It’s prefixed with private because no other class needs to use it. It’s a private variable used for one purpose—to fetch our data.
We then use the GET verb followed by the type of data we’re requesting. Which is our interface AccordionData array. Followed by the path to the data.
I’m using RxJS to manipulate the stream. RxJS is a library built right into Angular. It’s used for Observables. Which is entirely different topic. Observables in short however, are ways to observe changes in data.
We’re subscribing to the data and telling it what to do next. What to do if there’s an error. And what to do when the process is complete. The only take away here is we’re setting the empty array to the retrieved value.
  ngOnInit(): void {
    this._http
      .get<AccordionData[]>('assets/data.json')
      .pipe(take(1))
      .subscribe({
        next: (val) => {
          this.accordionData = val;
        },
        error: (err: Error) => {
          console.log(err);
        },
        complete: () => {
          console.log('finished');
        },
      });
  }
Toggle Angular Accordion Sections
This is the last of the functions. This function takes two arguments. One is the event object. The other is the index. In the markup, we obtain the section on click. Pass the section number here and use e.target.parentElement to obtain the DOM element.
We then cycle through all the section headers and apply a “hidden-content” class to them. We’re also saying, if the index number matches the section header, open it via the ‘show-content’ class. It looks more intimidating than it is. No need to understand all the code. Just understand the process of capturing an element and toggling classes.
  // Toggle Accordion
  toggleSection(e: any, index: number) {
    var allGroups = [];
    allGroups =
      this.accordionParent.nativeElement.getElementsByClassName(
        'hidden-content'
      );
    for (var j = 0; j < allGroups.length; j++) {
      if (
        index === j &&
        !e.target.parentElement
          .querySelector('.hidden-content')
          .classList.contains('show-content')
      ) {
        e.target.parentElement
          .querySelector('.hidden-content')
          .classList.add('show-content');
      } else {
        allGroups[j].classList.remove('show-content');
      }
    }
  }
Lean Markup
The markup is essentially one giant HTML block with settings for each section. That’s to say, the ngFor directive at the very top. I’ve seen markup get pretty messy and often times have unnecessary tags, parents, and children. Usually written by devs that have no interest in the frontend in my experience. So, regardless of the frontend task, keep the markup as lean as possible. Each section is initialized with a double loop indicative of the payload.
Every framework is different. Angular’s no exception. In fact, it can be daunting to beginners. Probably because React is made to get up and running very quickly. It doesn’t require the need to be proficient in TypeScript. Or even possess strong knowledge of JavaScript. In turn, Angular is a gargantuan change of pace.
But in my opinion, it’s not about the code or syntax. It’s about the processes. So moving from one framework to the next should be easier when we know the steps involved.
To run through another, similar project with TypeScript and Angular, check out this one. The date picker may also be a good one as it’s not a tremendous amount of code, and a very powerful component. If you’re looking for a challenge, this D3 Bar Chart is a good fit!
Apply the Styling
The scss variables at the top are no doubt housed in another file, then imported. Therefore, we set the stage to change the entire color palette in one fell swoop. As mentioned on other pages, I use nesting to compartmentalize styling blocks. Looks cleaner, easier to read, and definitely a safer bet.
I must say, even while working on high profile projects—I notice devs writing inline styles. Please, avoid this at all cost! It’s inflexible and definitely frowned upon. A tangent. I digress.
SCSS is very powerful and has an abundance of useful features. Nesting is just one of them. Regardless, do whatever you can to keep CSS tidy. It can get unwieldy quick! Doing so is a task and undoubtedly takes practice. That’s why there’s so many CSS tools that come and go. Bootstrap and Material are common but they’re certainly not used throughout the industry.
Good frontend devs find ways or have tried and tested methods of modularizing CSS for instance. Splitting it up in components. Or doing something unique to the project at hand.
In Conclusion
Regardless of the project, components like these are always helpful in organizing the UI for any screen size. Making components like this clean, malleable, and easy to maintain are crucial. For example, at my current place of employment, there’s archaic code. Features without documentation and comments. There’s basic components that don’t work or are unresponsive. But I digress. Hope you found this Angular Accordion post useful!
1 thought on “Powerful Angular Accordion to Enhance Your UI”