
Last Updated on June 30, 2024 by E. Scott
This React Supabase app illustrates basic features in both the UI framework and the realtime backend/ API. The process is conventional.
Table of Contents
- Create a file with the Supabase connection information (url & key)
- Query the database with the name and selection criteria
- Show the loader component
- Set the state with the returned value
- Display an error if something goes wrong
- Data populates the UI
- When a filter is selected, run the useEffect block again that contains a dependency
Supabase is known as the Firebase alternative. I’m not a Google advocate by any means, so I always look for alternative tools. Without having tremendous experience in this one, I quickly concluded it offers tools similar to Mongo and Okta such as authentication and data storage.
Getting up and running was a breeze. I logged in via Git, created a new database, and added content. Made the connection via the Supabase documentation, and I had an API ridiculously fast.
React Supabase
Begin with the initialization file as shown below. This information can be found in API Docs – Introduction.
import { createClient } from "@supabase/supabase-js";
const supabaseUrl = "url";
const supabaseKey = "alpha numeric string";
const supabase = createClient(supabaseUrl, supabaseKey);

export default supabase;
In order to make this work however, you need to install the necessary packages. If you’re logged in however, I found it difficult to locate the necessary commands. I had to log out, go to Docs then Local Development. It’s here where you’ll find the tools to develop and deploy. Thereafter, you can access the Supabase object.
In my App.js I imported the initialization file and made the request.
import supabase from "./supabase";

function App() {
  useEffect(
    function () {
      async function getFacts() {
        let query = supabase.from("db-name").select("*");
        ...
      }
      getFacts();
    },
    [dependency]
  );

  return ...
}

export default App;
At this point state can be set and the data is disbursed however necessary. There’s not a tremendous amount happening here so I didn’t use React Context. In the event of a larger React Supabase app, I certainly would.
I’ve spent far more time developing Angular apps than React. So in this process I was thinking of the simplicity of Angular services. It made me realize why React took off as quickly as it did and began dominating much of the market. Yes, it’s very powerful, but I think Angular structure is a cleaner and easier to maintain. I’m glad the bundle size has decreased so much and that the market is evening out. I digress. Ping the API and disburse the data in a way that’s sustainable for your app.
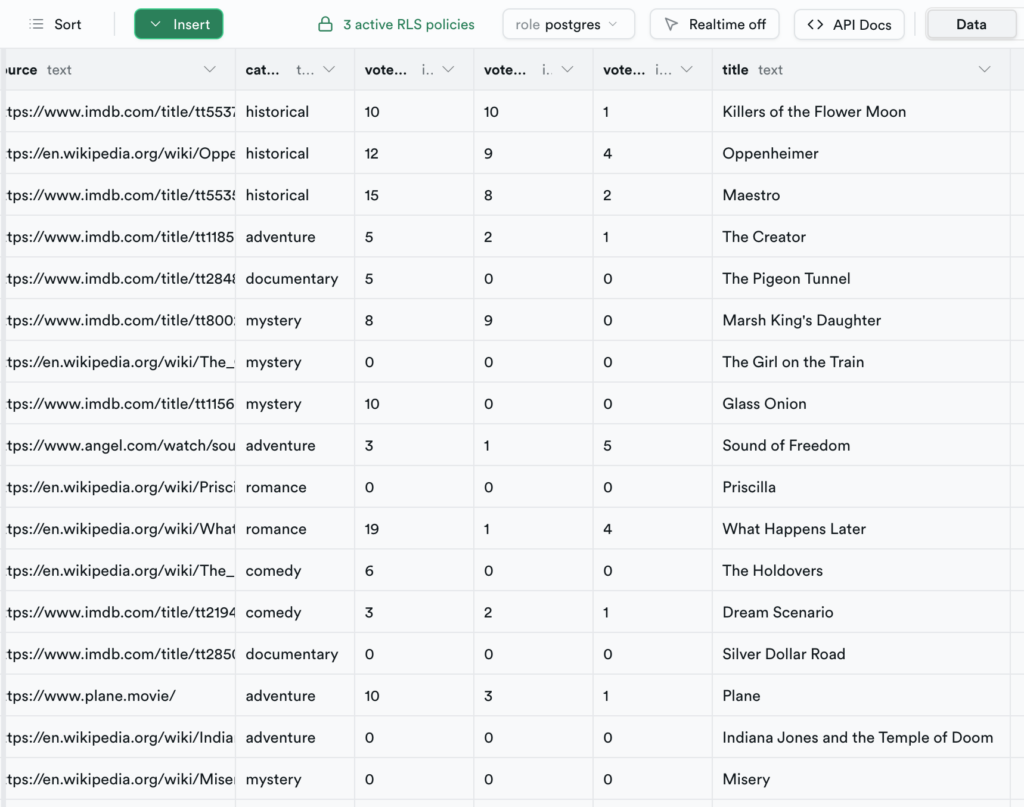
To create your own database, you’ll need the following fields:
- text
- source
- category
- votesinteresting
- votesawesome
- votesfalse
Populate the Content
There’s multiple components at play here.
- App component of course is the parent (shown below). This holds the input form (shown below). It also holds the Header component, Filter component, Loader, Error, and Content Components. All of which are stateful aside from the Loader and Error components.
- Whether it’s React Supabase or whatever Supabase, making this whole process work was feasible (for me at least), by literally sketching this out in advance. Usually I create a mock vs building then reshuffling during development.
- The Filter component receives a state reference in it’s parent. So the click event actually updates the state in another component. This is the way most of the aforementioned components work actually.
const CATEGORIES = [
  { name: "adventure", color: "#1E90FF" },
  { name: "mystery", color: "#6495ED" },
  { name: "documentary", color: "#7B68EE" },
  { name: "comedy", color: "#4169E1" },
  { name: "romance", color: "#0000FF" },
  { name: "historical", color: "#0000CD" },
];

function App() {
  const [showForm, setFormState] = useState(false);
  const [factList, setFacts] = useState([]);
  const [isLoading, setLoader] = useState(false);
  const [hasError, setError] = useState(false);
  const [currentCategory, setCurrentCategory] = useState("all");

  useEffect(
    function () {
      async function getFacts() {
        setLoader(true);

        let query = supabase.from("db-name").select("*");
        if (currentCategory !== "all") {
          query = query.eq("category", currentCategory).order("votesinteresting", { ascending: false });
        }

        const { data: facts, error } = await query;
        if (!error) {
          setFacts(facts);
        } else {
          setError(true);
        }
        setLoader(false);
      }
      getFacts();
    },
    [currentCategory]
  );

  return (
    <div className="wrapper">
      {showForm ? <InputForm className="fact-form" categoriesData={CATEGORIES} setFactState={setFacts} resetForm={setFormState} /> : null}
      <Header showForm={showForm} setFormState={setFormState} />
      <main>
        <CategoryFilter categoriesData={CATEGORIES} currentCategory={setCurrentCategory} />
        {isLoading ? <Loader /> : hasError ? <Error /> : <FactList categoriesData={CATEGORIES} facts={factList} />}
      </main>
    </div>
  );
}
The CATEGORIES var are the movie categories which are passed to the input form and used in the dropdown menu. useEffect is being used here to fetch the initial payload. It’s being called each time a filter is selected. It’d be more apropos however to cache everything as it comes in. Then on filter change, check the cache and fetch only if it does not exist.
The Loader is always set to true at the start of useEffect, then set to false after the conditional. Notice the <Loader /> at the end of the JSX. Back in useEffect, if there’s an error, the state is set and the Error component becomes visible. All the components in this section are working similarly.
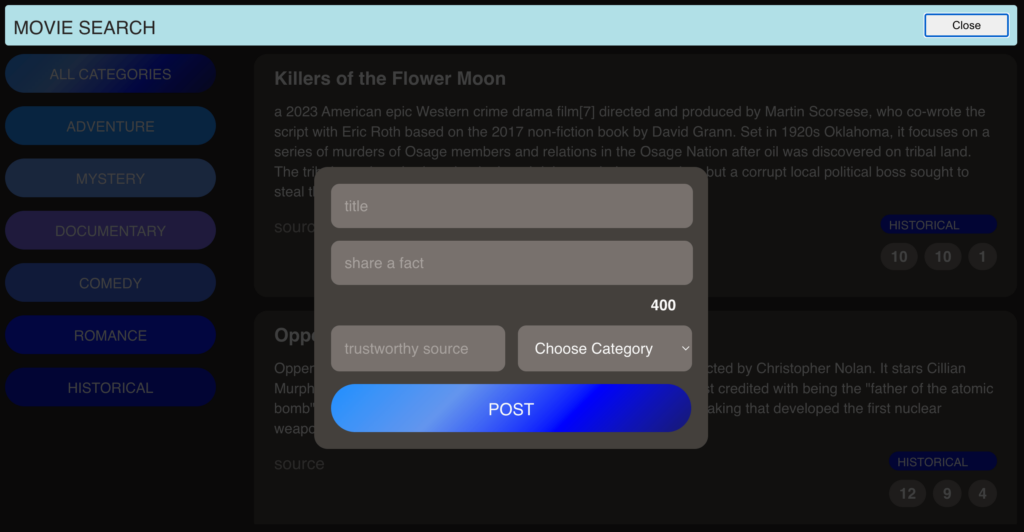
Add New Items
  async function submitHandler(e) {
    e.preventDefault();
    if (text && isValidHttpUrl(source) && category && text.length <= 400) {
      setUploading(true);
      const { data: newFact } = await supabase.from("db-name").insert([{ title, text, source, category }]).select();
      setFactState((facts) => [newFact[0], ...facts]);
      setText("");
      setCategory("");
      setSource("");
      resetForm(false);
      setUploading(false);
    }
  }
Adding new items is done so here, with the form. Toggling occurs via the button in the header. When the form shows, there’s validation on all form fields. All of which simply check for content except for the source, which ensures the text is a URL. If the criteria is met, the new item is prepended to the list and added via the React Supabase connection. Thereafter, fields are reset. Between these two technologies the functionality was really quite easy. Doing this without React would’ve been cumbersome. Doable, but with more code nonetheless. Regardless, hope you’ve enjoyed reading about this React Supabase project.
Leave a Reply