
Last Updated on July 20, 2024 by E. Scott
I recently had an urgent need to build a React data table. There was no mock or endpoint. The task was to develop a data table with expandable rows and search as quickly as possible. Developing and designing simultaneously can be challenging vs in sequence. So I did the best I could and arrived at this stage.
Table of Contents
I created a loader component that runs when the API is being fetched. The error component displays when there’s an API error. The React data table component holds most of the features as the entire project is based on it. I’ve never been one to go componentize everything unless there’s a need for thereof. I did however build a header component as I originally planned on it being a page masthead.
React Data Table Loader
The loader component usually won’t show for more than a few milliseconds. You can however adjust the connection speed in the dev tools to simulate a longer load time. I have a basic animation that repeats while the loader is mounted. Two lines of markup and some creative CSS. The most complicated part was figuring out where to put it. Ensuring it’d run when it’s supposed to. And that it doesn’t show when it’s not. The great thing about components is we can go totally bananas with a funny picture or meme, and then it’s gone. Realistically, replace the animation with whatever suits your needs.

Error Component
Similar situation with the error component. There’s barely any styling, and but a few lines of markup. Feel free to go bananas here as well of course as every component is born, then dies. What could be done here however to enhance the UI, would be targeting error codes. So, showing a different component contingent on whether the error is a 500 or 403. That’d be kinda cool. Something else that occurred to me was to create a global error handler vs one agnostic to the API.

React Data Table Component
OMG—the React data table component. There’s a fair amount going on here. The useEffect block fires first. It checks to see if there’s a payload. If not, we fetch the data.
  useEffect(() => {
    if (!payload.length > 0) {
      getData();
    }
    if (hasError) {
      return <Error />;
    }
  }, [payload]);
The block below is the data fetch wrapped in an await function. This is set up for pagination which has not been integrated yet. To view a great example of pagination, clone this project. The premise here is to check for the selected page in the cache prior to making the call. This is why we check the parsed localStorage. Beyond that, the total items are set.
async function getData() {
await fetch(`https://dummyjson.com/products`)
.then((response) => response.json())
.then((data) => {
const cachedItems = localStorage.getItem("dataKey");
const parsed = JSON.parse(cachedItems);
if (!parsed) {
const masterArray = JSON.stringify(data.products);
localStorage.setItem("dataKey", masterArray);
populateTable(data.products);
}
if (parsed) {
const arr = [...payload, ...data.products];
localStorage.setItem("dataKey", JSON.stringify(arr));
populateTable(arr);
}
totalItems.current = data.total;
pages.current = totalItems.current / requestLimit;
})
.catch(() => {
setError(true);
});
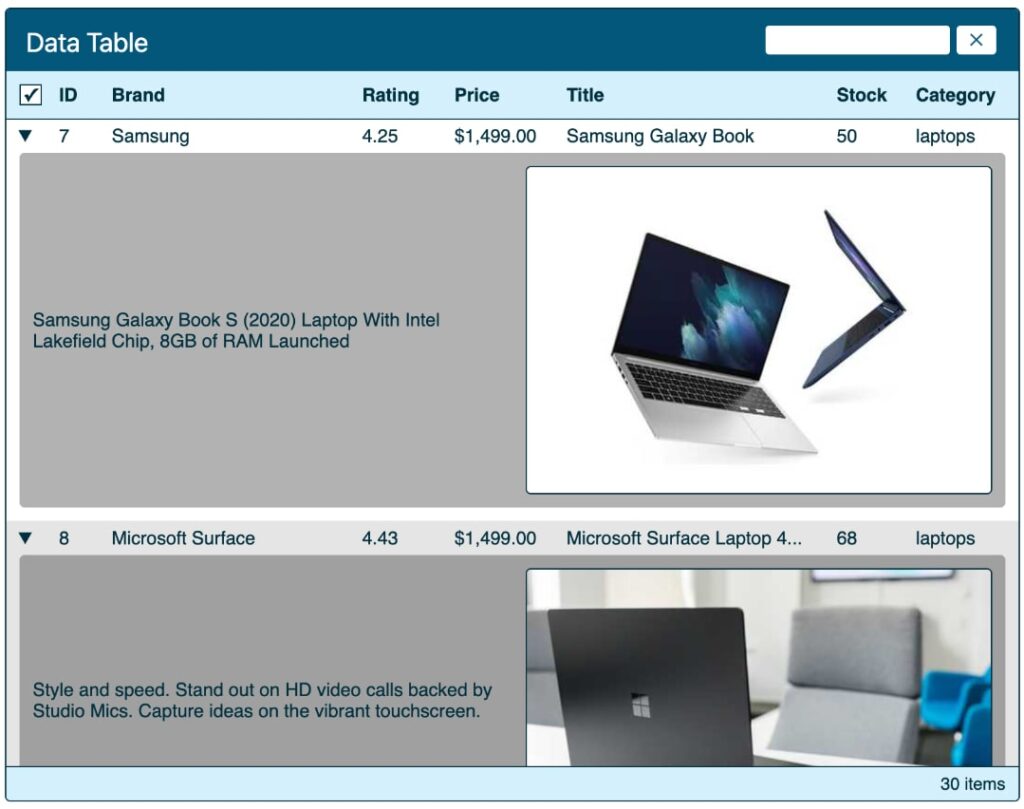
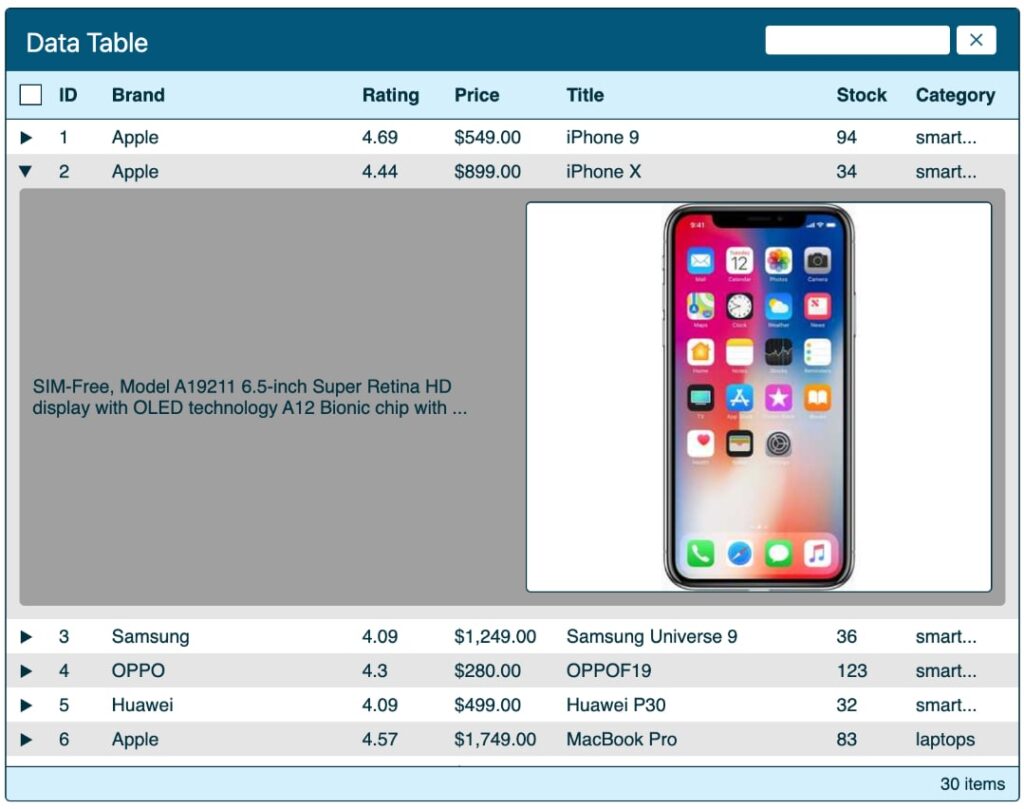
}Hereafter, we loop over the data and render the table. As shown below. This block only renders if there’s a payload as shown on line 1. Then, we loop over the headers. The click event (filterByType) sorts columns unidirectionally. Logic here was to get basic sorting in asap as this was a rush job. The other direction could be added in the function as the base line feature is here.
 return payload.length > 0 ? (
    <>
      <div className={classes.wrapper}>
        <Header data={payload} populateTable={populateTable} />
        <div className={classes.mobileWrapper}>
          <div className={classes.tableWrapper}>
            <div className={`${classes.tableRow} ${classes.tableHeader}`}>
              <div onClick={expandAllRows} className={classes.showAll}>
                {showAll && <span>✓</span>}
              </div>
              {columns.map(({ label, reference }) => {
                return (
                  <span key={reference} onClick={filterByType} className={sortedColumn == reference ? classes.activeColumn : null}>
                    {label}
                  </span>
                );
              })}
            </div>

            <div className={classes.tableBody}>
              {payload.map((item, index) => (
                <div className={classes.tableRow} key={index}>
                  <div className={classes.default}>
                    <span
                      id={item.id}
                      onClick={toggleClass}
                      className={rowReference.current === item.id || showAll ? `${classes.rotateCaret}` : `${classes.defaultCaret}`}
                    >
                      ▶
                    </span>
                    <span className={classes.cell}>{item.id}</span>
                    <span className={classes.cell}>{item.brand}</span>
                    <span className={classes.cell}>{item.rating}</span>
                    <span className={classes.cell}>{USDollar.format(item.price)}</span>
                    <span className={classes.cell}>{item.title.length > 25 ? item.title.slice(0, 27) + "..." : item.title}</span>
                    <span className={classes.cell}>{item.stock}</span>
                    <span className={classes.cell}>{item.category.length > 8 ? item.category.slice(0, 5) + "..." : item.category}</span>
                  </div>
                  <div className={rowReference.current === item.id || showAll ? `${classes.showRow}` : `${classes.hideRow}`}>
                    <div className={classes.imageWrapper}>
                      <p>{item.description}</p>
                      <div>
                        <img src={item.images[0]} />
                      </div>
                    </div>
                  </div>
                </div>
              ))}
            </div>
            <footer className={classes.tableFooter}>
              <span>{payload.length} items</span>
            </footer>
          </div>
        </div>
      </div>
    </>
  ) : hasError ? (
    <Error />
  ) : (
    <Loader />
  );
The price column contains formatting that can easily be changed to another currency. The title column gets truncated and appended with an ellipsis. As does the category column. Line 39 contains the hidden row with the toggleClass function below. These items are associated with the current state. See them here.
// Toggle Individual Rows
const toggleClass = (e) => {
const index = parseInt(e.target.attributes[0].value);
index === rowReference.current ? (rowReference.current = null) : (rowReference.current = index);
showHiddenRow(!defaultRow);
};
// Toggle All Rows
const expandAllRows = () => {
toggleAllRows(!showAll);
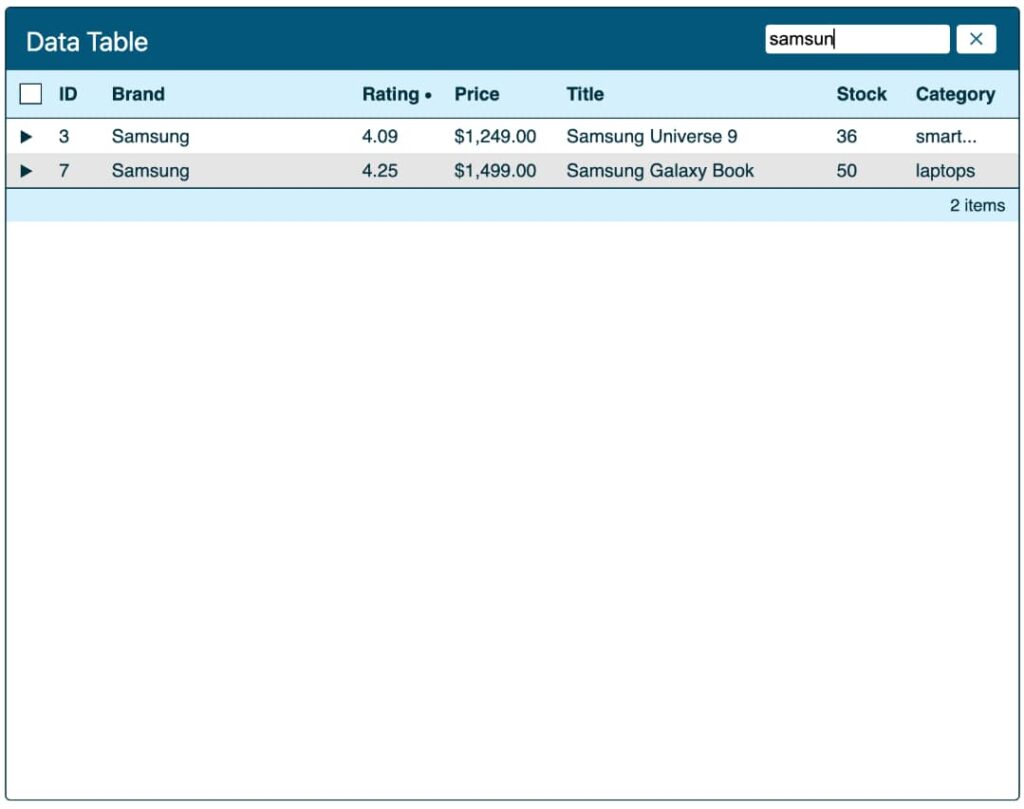
};Header Component
The header component is passed the payload on line 4 of the table component. Searching occurs here. Via the onChange event, brand, description, title, and category are searched. Then all four arrays are merged into one. Followed by removing duplicates. The removeDuplicates array is then passed into the current state. When the search is removed, the payload array is returned via the cache.
If you’d like to practice with some great payloads either of these two projects are a great bet. The payloads are detailed and easy to manipulate contingent upon the parameters.
To be honest, I struggled at maintaining the master array. Though I know it’s not ideal, I’m using the restoration from localStorage. If you have a quick fix, I’d love to hear from you in the comments below. And of course any other comments you have.
Beyond the React Data Table
I’ve worked in a lot of industries, building a very wide array of projects. Many of which with different technologies. I encounter a lot of devs with a React background. And when it comes to building things outside of the framework, I’ve noticed it’s common for them to struggle. Writing for instance plain TypeScript or doing heavy JavaScript.
One would think a frontend developer is savvy in anything frontend. But that’s not the case. My TypeScript skills undoubtedly are solid because of my Angular experience which uses TypeScript by default. I also spent four years doing nothing else but writing vanilla JavaScript.
So, if you’re not as confident as you’d like to be on the frontend, build, build, build! Write a ton of code so in your next role, you’re the frontend dev that’s killing it in TypeScript.
Conclusion
To see more projects like this one, view a descriptive list here. Or, jump to the weather app, OMDB API, or check out an Angular-Node website.
Building this was no doubt interesting. It’d been a while since I’ve used React over Angular. So it was nice to use it, comparing the features all the while. Regardless, I hope you can use this as a learning device or even in a real world project. Again, comments are greatly appreciated. I hope you’ve enjoyed this React data table post.
Leave a Reply