
Last Updated on June 30, 2024 by E. Scott
The NASA Photo of the Day API, (dubbed APOD Nasa Gov), is a neat endpoint. It outputs photographic urls and descriptions for any given date. Dates extend as far back as 1995. Development aside, I think it’s absolutely amazing any individual with rudimentary programming skills can tap into NASA’s data archives. Programming skills can be in any one of a variety of languages. One simply needs the ability to perform a GET request in their most comfortable language.
Table of Contents
This is an app written in TypeScript with a little RxJS.
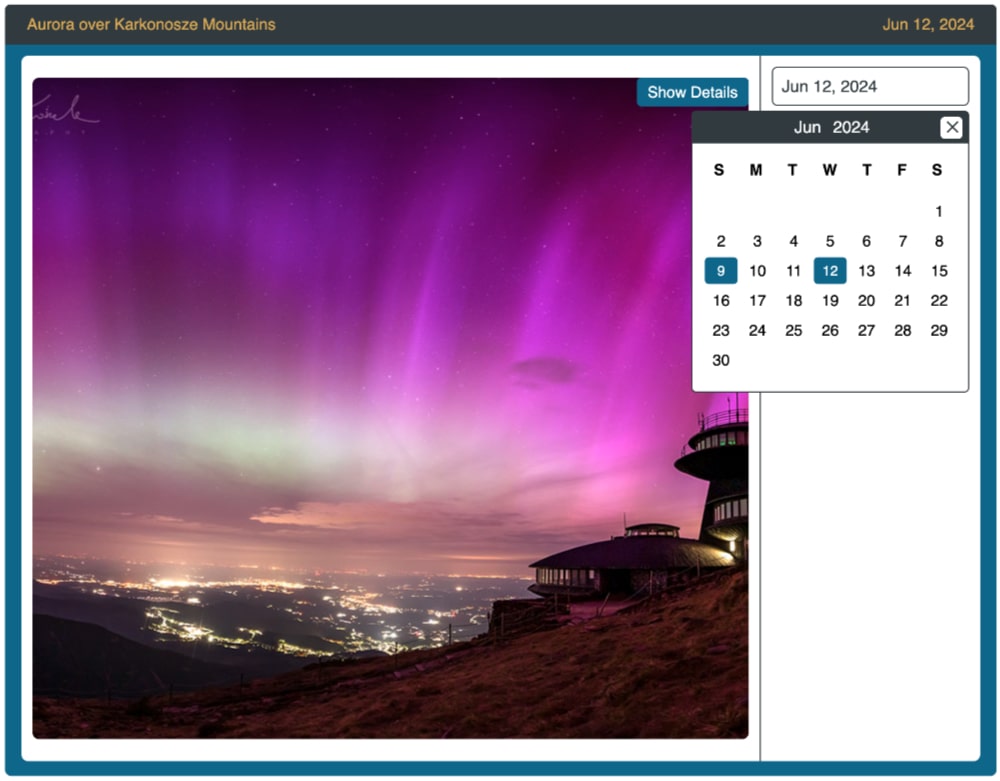
- It consists of a header component displaying the photo title and date.
- The date is derived from the date picker component which sends it to a service.
- Observers listen to updates in the header, main photo component, and sidebar.
- All of which are wrapped in a parent component.
Though the endpoint primarily outputs photos, sporadically it supplies a video. Which is handled accordingly, enabling the UI to play an array of videos from Mars, galaxies, and other far away places. There’s a number of ways the UI could be designed to accommodate date selection and data display. This elementary layout certainly achieves the goal, responsively.
NASA Photo of the Day App
In this NASA Photo of the Day app, we have the header, body, and search components shown below. In other frameworks, app component may be main.ts or an index.html. Every framework is unique. This undoubtedly could be built just with JavaScript. Or solely with TypeScript.
I use Angular because I’ve written applications with thereof for over a decade now.
The header click event simply closes the date picker. As does the body external click event. The outputData event outputs the history. There’s no need for routing. But, the date is being appended to the URL. This occurs in the service (nasa.service.ts) at line 64.
<div id="nasa-pod" class="element-shadow">
  <nasa-pod-header (click)="externalClick()"></nasa-pod-header>
  <main>
    <div
      nasa-photo-body
      (outputData)="searchResults($event)"
      class="column-data"
      (click)="externalClick()"
    >
      <div class="photo"></div>
      <p>Photo description ...</p>
    </div>
    <div nasa-search class="column-search"></div>
  </main>
</div>
We’re not using a router, so one is not included. The module however simply includes the components:
- App Component
- Calendar Component
- Header Component
- Search Component
- Photo Body Component
import { NgModule } from "@angular/core";
import { BrowserModule } from "@angular/platform-browser";
import { AppComponent } from "./app.component";
import { CalendarComponent } from "./components/date-picker/date-picker.component";
import { WindowRef } from "./windowRef";
import { NasaHeaderComponent } from "./components/header/header.component";
import { NasaSearchComponent } from "./components/seachbar/search.component";
import { YouTubePlayerModule } from "@angular/youtube-player";
import { provideHttpClient, withInterceptorsFromDi } from "@angular/common/http";
import { NasaPhotoBodyComponent } from "./components/photo-body/photo-body.component";

@NgModule({
  declarations: [AppComponent, CalendarComponent, NasaHeaderComponent, NasaSearchComponent, NasaPhotoBodyComponent],
  bootstrap: [AppComponent],
  imports: [BrowserModule, YouTubePlayerModule],
  providers: [WindowRef, provideHttpClient(withInterceptorsFromDi())],
})
export class AppModule {}
Other Components
As previously explained we have four components. The date picker has a post of it’s own so I won’t cover that here. But see it in action on it’s own.
The photoBody has very basic Angular directives. For even remedial developers, this should look pretty basic. But shall you have questions, please free to leave a comment or question. I’ll be happy to explain whatever you need. You can view the photoBody TypeScript here. The search bar is nearly empty, but is an ideal location to pull the cache and display previously viewed imagery. Header component only contains the date, which is obtained from @input & @output.
<div class="photo-body">
  <button type="text" (click)="showText()">
    {{ fullExplanation && !datePickerStatus ? "Hide " : "Show " }}Details
  </button>
  <div
    class="hd-url"
    [ngStyle]="{ 'background-image': getUrl() }"
    (click)="closeCalendar()"
    *ngIf="mediaType! === 'image'"
  ></div>
  <div class="video-wrapper" *ngIf="mediaType! === 'video'">
    <youtube-player videoId="{{ videoURL }}"></youtube-player>
  </div>
  <div class="explanation" *ngIf="fullExplanation && !datePickerStatus">
    {{ explanation }}
  </div>
</div>
APOD Nasa Gov Payload
I chose to include only the explanation in the UI. But, I’m certainly using the hdurl. Granted I could’ve used the url instead. Perhaps this would increase speed and performance. I didn’t test the difference, and loading time is always quick. The image tag uses a dynamic url. I’m also using the media_type in the code.
The header incorporates the title value. I could utilize the date, but it’s already displayed from the date picker component. I was happy to see the payload is very straightforward. Making it easy to disperse data wherever I need it. No need for double loops or dealing with nested arrays. This is as basic a payload as we can hope for.
{
    "copyright": "\nBray Falls & \nChester Hall-Fernandez\n",
    "date": "2023-08-22",
    "explanation": "This nebula had never been noted before. Newly discovered...",
    "hdurl": "https://apod.nasa.gov/apod/image/2308/Pistachio_Falls_2952.jpg",
    "media_type": "image",
    "service_version": "v1",
    "title": "The Pistachio Nebula",
    "url": "https://apod.nasa.gov/apod/image/2308/Pistachio_Falls_960.jpg"
}
In conclusion, and perhaps most importantly, visit the NASA API page and get yourself a key. Then plug it into the key value located in the environments file. This will get you up and running. Moreover, check out additional projects just like this one.
Wanna dive deep into a feature rich Angular app — check it out!
Otherwise, I hope you can easily clone this project and get it working without a hitch. Leave a comment if you have questions on my NASA Photo of the Day app.
I needed to draft you one little remark so as to thank you the moment again regarding the remarkable techniques you have featured in this case. It was so generous of you to grant publicly just what a lot of folks would have supplied as an ebook to generate some profit for their own end, mostly seeing that you could have done it in the event you considered necessary. The techniques likewise worked to become fantastic way to fully grasp other people have the identical zeal like my own to learn great deal more when it comes to this condition. I think there are a lot more fun sessions in the future for individuals that find out your blog.
Thank you. Glad you found it helpful.